Unlocking iPhone Potential: A Comprehensive Guide on How to Edit a PDF on iPhone
Welcome to a transformative journey where the convenience of your iPhone meets the power of efficient PDF editing. In a world constantly on the move, the ability to edit PDFs on your iPhone has become more than a convenience—it’s a necessity. This comprehensive guide is your key to mastering the art of PDF editing on your iPhone, from the built-in Markup tool to exploring advanced features in third-party apps. Join us as we delve into collaborative editing, cloud integration, and troubleshooting common issues, unlocking the full potential of your iPhone for seamless document management. Let’s embark on this digital adventure and discover how to edit a PDF on your iPhone like a pro.
Table of Contents
Why Edit PDFs on iPhone?
In a world where mobility is key, the iPhone has emerged as a powerful tool for on-the-go productivity. One of its standout features is the ability to edit PDFs seamlessly, revolutionizing the way we handle documents. Let’s delve into the reasons why editing PDFs on your iPhone is not just convenient but also essential.
1. Portability and Accessibility
Your iPhone is always within arm’s reach, making it the perfect companion for spontaneous edits. Whether you’re in a coffee shop, on public transportation, or waiting for a meeting to start, having the ability to edit PDFs on the spot enhances your productivity.
2. Immediate Response to Changes
Life moves fast, and so does business. With the iPhone, you can promptly respond to last-minute changes without the need for a computer. The “How to edit a PDF on iPhone” feature becomes invaluable when time is of the essence.

3. Effortless Annotation and Review
Need to add notes, highlights, or comments to a document? The iPhone’s intuitive interface and touch functionality make annotation a breeze. Collaborating with others or providing feedback has never been easier.
4. Seamless Integration with Cloud Services
The iPhone seamlessly integrates with popular cloud services, allowing for effortless syncing of edited PDFs across devices. This not only ensures consistency but also provides a backup in case of unexpected issues.
5. Sign Documents Anytime, Anywhere
The iPhone facilitates the often time-sensitive task of signing documents. With just a few taps, you can add your signature to contracts, agreements, or any other paperwork, eliminating the need for printing and scanning.
6. Environmentally Friendly Approach
Editing PDFs on your iPhone contributes to a paperless, eco-friendly approach. Reduce your carbon footprint by embracing digital edits, sparing countless sheets of paper in the process.
In conclusion, the ability to edit PDFs on your iPhone is a game-changer in today’s fast-paced world. The convenience, speed, and environmental benefits make it a skill worth mastering. Stay tuned for our step-by-step guide on “How to edit a PDF on iPhone,” where we’ll walk you through the process, ensuring you harness the full potential of your iPhone for document editing.
Default iPhone PDF Editing Options
When it comes to editing PDFs on your iPhone, Apple has equipped its devices with a handy built-in tool known as Markup. This default feature offers a quick and straightforward way to make basic edits to your PDF documents. Let’s explore the default iPhone PDF editing options and discover how you can utilize Markup for seamless document modifications.
1. Accessing Markup Tool
To begin editing a PDF on your iPhone, open the document using the default Files app. Tap on the document and select the Markup tool from the options menu. This instantly opens up a range of editing tools at the bottom of your screen.
2. Annotating and Highlighting
Markup allows you to annotate PDFs effortlessly. Whether you need to highlight important passages, underline key points, or add freehand drawings, Markup provides a variety of annotation tools. Simply choose the tool that suits your editing needs and start annotating.
3. Adding Text and Shapes
Need to insert additional information or emphasize specific details? Markup enables you to add text boxes and shapes to your PDF. This is particularly useful for filling out forms or providing additional context within the document.
4. Erasing and Undoing Edits
Mistakes happen, and Markup has you covered. If you make an unintended mark or want to undo an edit, simply use the eraser tool or tap the undo button. This ensures that your final document is polished and error-free.
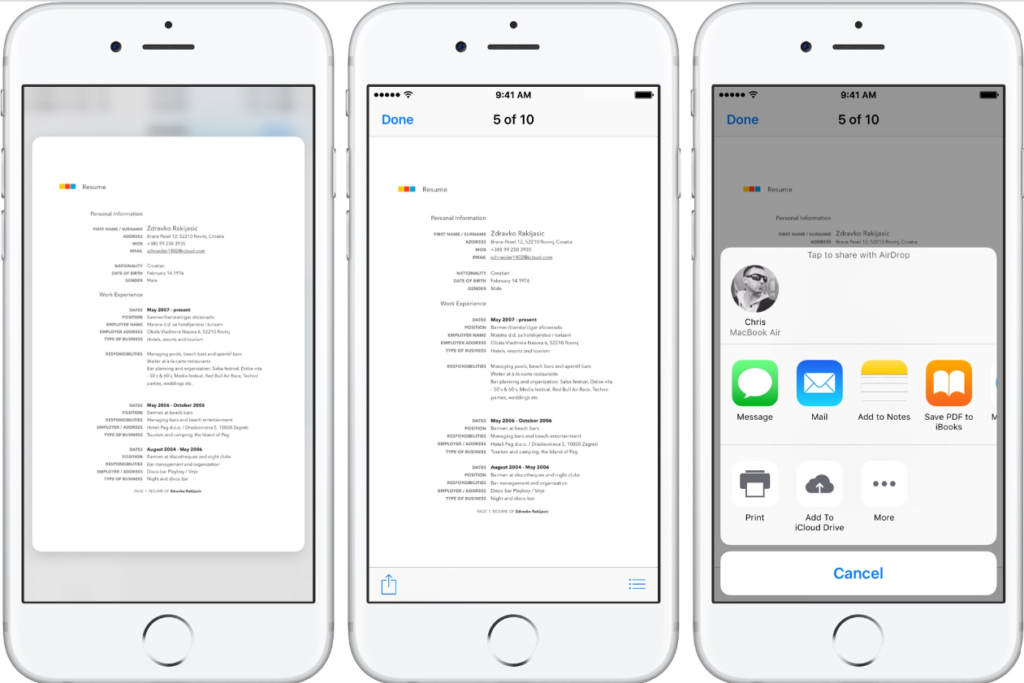
5. Saving and Sharing Edits
Once you’ve made the necessary edits to your PDF, saving and sharing the document is a breeze. Tap “Done” in the upper-right corner and choose to save the changes. You can then share the edited PDF via email, message, or any other preferred method.
In conclusion, Apple’s default iPhone PDF editing options through Markup offer a user-friendly solution for quick edits on the go. While Markup may not cover all advanced editing needs, its simplicity makes it a valuable tool for basic annotations and modifications. Stay tuned for our upcoming guides where we’ll explore third-party PDF editing apps for more comprehensive editing capabilities on your iPhone.
Third-Party PDF Editing Apps
While the default Markup tool on your iPhone is handy for basic edits, third-party PDF editing apps elevate your editing capabilities to a whole new level. These apps bring a myriad of features, allowing you to perform advanced edits, collaborate seamlessly, and enhance your overall PDF editing experience. Let’s explore some popular third-party PDF editing apps that cater to the diverse needs of iPhone users.
1. Adobe Acrobat Reader
Key Features:
- Comprehensive editing tools.
- Advanced text and image manipulation.
- Robust collaboration features.

2. PDF Expert by Readdle
Key Features:
- Intuitive user interface.
- In-depth editing options, including page management.
- Seamless integration with cloud services.

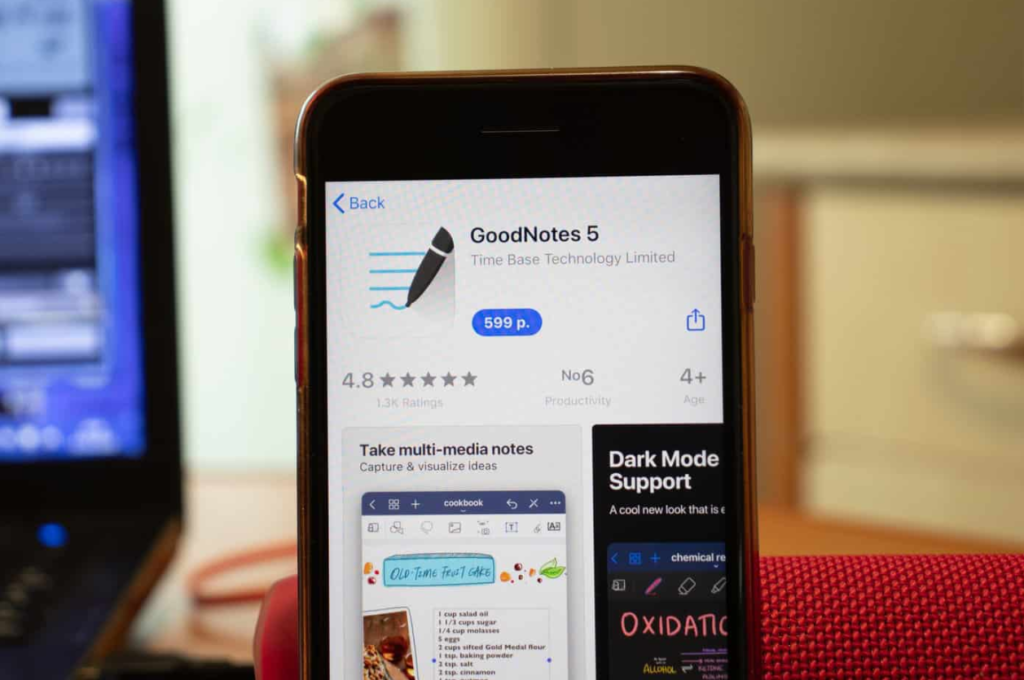
3. GoodNotes
Key Features:
- Handwritten annotations and drawings.
- Note-taking capabilities.
- Smooth synchronization with other devices.
4. PDFpen
Key Features:
- Robust text editing and formatting options.
- Optical Character Recognition (OCR) for scanned documents.
- Ability to create and edit form fields.
Where to Add Images: Include visuals demonstrating the OCR feature in action, examples of text formatting, and the creation/editing of form fields.
5. Microsoft Office: Word, Excel, PowerPoint
Key Features:
- Seamless integration with Microsoft Office suite.
- Familiar interface for Office users.
- Collaborative editing on shared documents.
Third-party PDF editing apps for iPhone provide a wealth of features that go beyond the capabilities of the default Markup tool. Whether you need advanced editing, collaboration options, or specialized functionalities, these apps cater to a variety of user preferences. In our next guide, we’ll walk you through practical scenarios using these apps to edit PDFs on your iPhone, empowering you to choose the best tool for your specific needs.
Step-by-Step Guide: How to Edit a PDF on iPhone
Editing PDFs on your iPhone becomes a seamless process with the built-in Markup tool. Whether you need to annotate, highlight, or add text, Markup offers a user-friendly interface for basic edits. Let’s walk through a step-by-step guide on how to use Markup for essential modifications to your PDF documents.
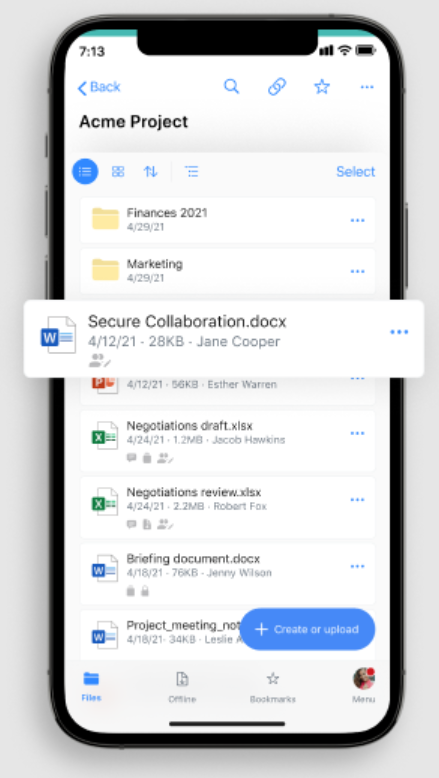
1. Open the PDF in the Files App
Begin by locating the PDF you wish to edit in the Files app on your iPhone. Tap on the document to open it. If the document is stored in iCloud Drive or another cloud service, ensure it is downloaded for offline access.
Image: Include a screenshot of the Files app with a PDF file selected.
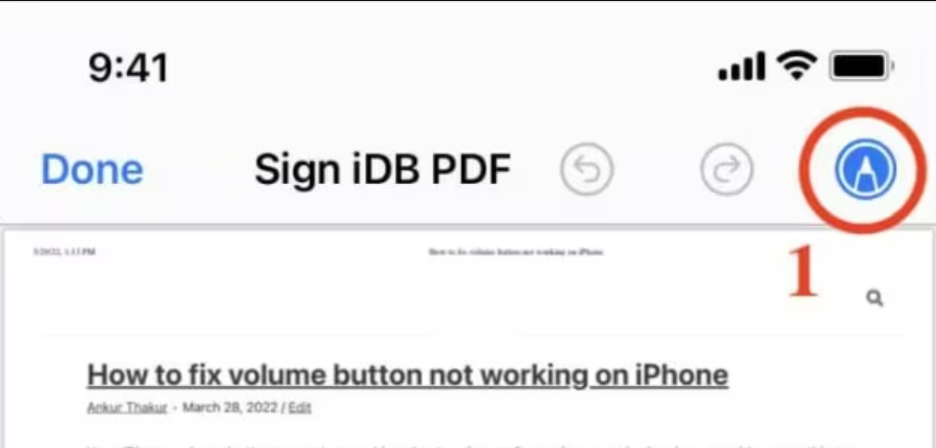
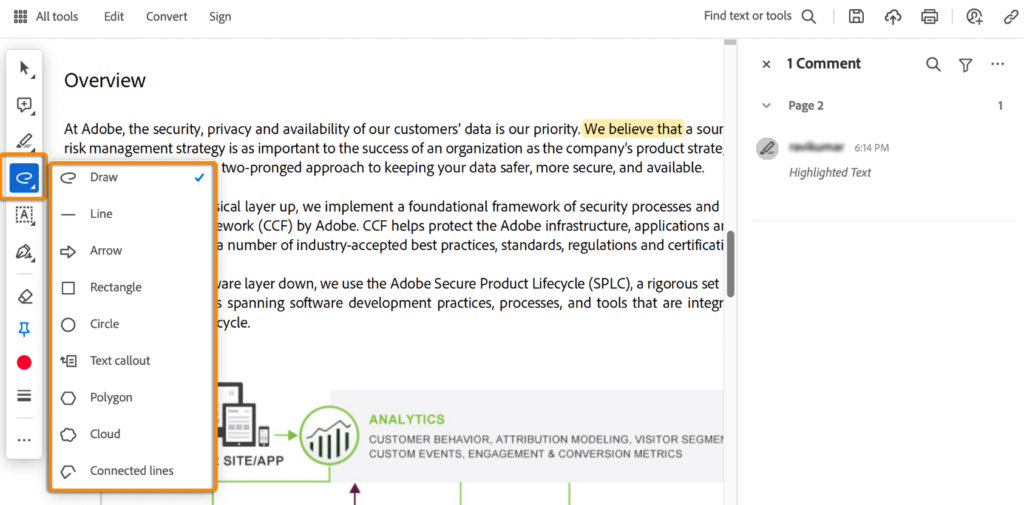
2. Access the Markup Tool
Once the PDF is open, tap the Markup icon. It looks like a pen inside a circle and can be found in the upper-right corner of the screen. This action opens the Markup interface, providing a range of tools for editing.
Image: Show a screenshot highlighting the Markup icon in the Files app.
3. Annotate Text and Add Highlights
Choose the text tool from the Markup toolbar. Tap on the section of text you want to annotate and start typing. To highlight text, use the highlighter tool. Adjust the color and opacity as needed for clear visibility.
Image: Include screenshots demonstrating the selection of text and the use of annotation and highlight tools.
4. Add Freehand Drawings or Shapes
Select the drawing tool for freehand annotations or the shape tool for predefined shapes. Use your finger to draw or choose from shapes like circles or arrows. This is particularly useful for emphasizing specific elements in the document.
5. Insert Text Boxes and Comments
To add additional information or comments, use the text box tool. Tap where you want to add the text box and start typing. You can also use the comment tool to leave notes for yourself or collaborators.
6. Erasing and Undoing Edits
Mistakes are inevitable, but Markup provides easy solutions. Use the eraser tool to remove unwanted annotations or drawings. If you make a mistake, tap the undo button to revert to the previous state.
7. Save and Share Your Edited PDF
Once you’re satisfied with your edits, tap “Done” in the upper-right corner. Choose whether to save a copy of the edited PDF or overwrite the original file. You can then share the edited document via email, message, or other sharing options.
In conclusion, using Markup for basic edits on your iPhone is a straightforward process. Whether you’re a student annotating lecture notes or a professional highlighting key points, Markup streamlines the editing experience. Stay tuned for more guides on advanced PDF editing options for iPhone, expanding your capabilities even further.
Advanced Editing with Third-Party Apps
While the built-in Markup tool offers basic PDF editing on your iPhone, third-party apps take your editing capabilities to the next level. Let’s explore how these apps empower you with advanced features, making tasks like merging, splitting, and rearranging pages a breeze.
1. Merging and Splitting PDFs
Third-party apps like Adobe Acrobat and PDF Expert provide intuitive interfaces for merging multiple PDFs into a single document or splitting one PDF into multiple files. To merge, simply import the files you want to combine, arrange them in the desired order, and save the merged PDF. For splitting, choose the specific pages you wish to separate and create individual PDFs effortlessly.
2. Page Rearrangement and Rotation
Need to rearrange the order of pages or adjust their orientation? Third-party PDF editing apps allow you to drag and drop pages into the desired sequence and rotate them as needed. This is particularly useful when dealing with scanned documents or pages in different orientations.
Image: Showcase the page rearrangement and rotation features, providing before-and-after visuals.
3. Text and Image Manipulation
Unlike the limited text editing options in the default Markup tool, third-party apps offer more robust text manipulation. You can edit, format, and resize text with greater flexibility. Additionally, these apps provide advanced image editing capabilities, allowing you to insert, replace, or enhance images within your PDF.
4. Form Field Creation and Editing
For interactive PDFs with form fields, third-party apps like PDFpen enable you to create, edit, and fill in form fields with ease. This is invaluable for businesses and professionals handling documents that require user input.
5. Optical Character Recognition (OCR)
Some third-party apps, such as PDFpen, come equipped with OCR capabilities. This feature allows you to convert scanned documents into editable and searchable text. Perfect for turning physical documents into digital, editable files.
In conclusion, third-party PDF editing apps on your iPhone extend your editing capabilities far beyond the basics. Whether you’re managing complex documents, working with forms, or transforming scanned pages, these apps provide a comprehensive set of tools. Stay tuned for our practical guide, where we’ll walk you through specific scenarios using these advanced features, ensuring you harness the full potential of third-party PDF editing on your iPhone.
Signing Documents on iPhone
In our increasingly digital world, the ability to sign documents on your iPhone has become an invaluable feature, streamlining workflows and eliminating the need for physical paperwork. Let’s explore the straightforward process of signing documents using your iPhone, making the often cumbersome task of obtaining signatures more efficient.
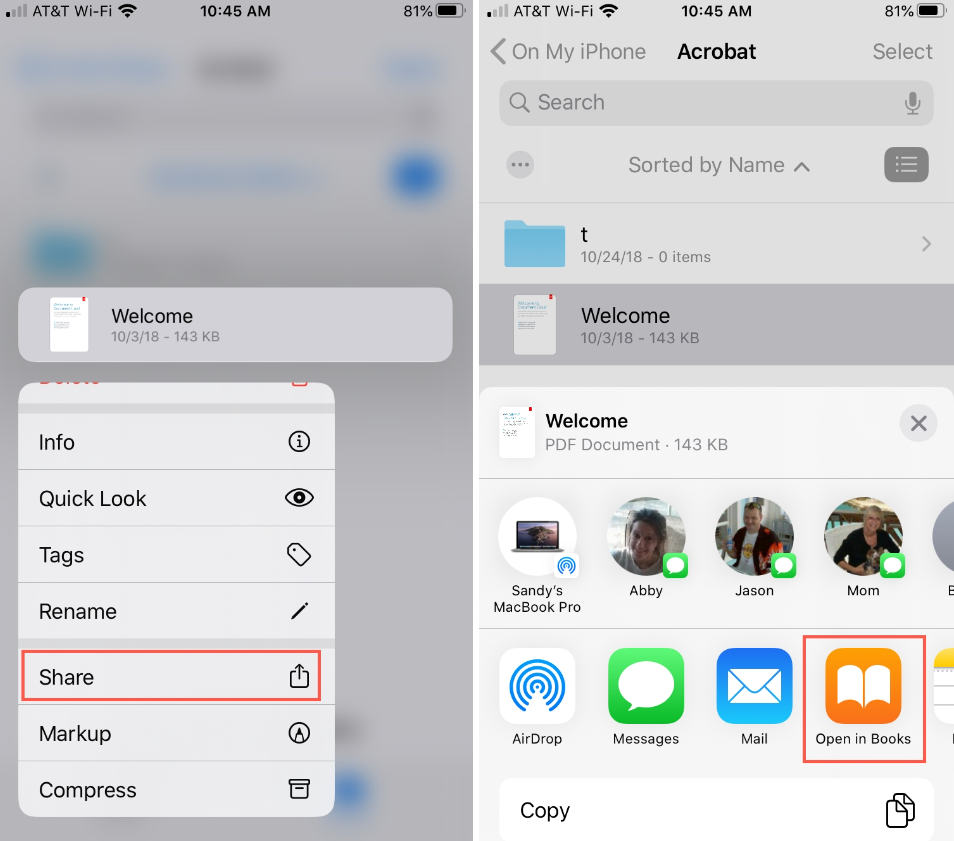
1. Select the Document
Begin by opening the document you need to sign. This can be a contract, agreement, or any other PDF file that requires your signature. Ensure the document is accessible on your iPhone through the Files app or a cloud service like iCloud Drive.

2. Access the Markup Tool or Third-Party App
If you’re using the default Markup tool, tap on the document and select the Markup icon in the upper-right corner. If you prefer a third-party app like Adobe Acrobat or PDF Expert, open the app and import the document.
3. Choose the Signature Tool
Within the Markup tool or your chosen third-party app, locate the signature tool. This is typically represented by a pen or signature icon. Tap on this tool to access the signature options.
4. Create or Import Your Signature
You have the option to create a new signature directly on your iPhone by using your finger or stylus. Alternatively, some apps allow you to import a pre-saved signature for a more professional and consistent look. Follow the on-screen instructions to input or import your signature.
5. Place Your Signature
Once your signature is ready, place it in the designated area of the document. Most apps allow you to resize and reposition your signature for a precise fit. Confirm the placement and save the document.
6. Save and Share the Signed Document
After signing the document, save the changes. If you’re using the Markup tool, tap “Done” and choose to save a copy of the edited PDF. If you’re in a third-party app, follow the app-specific steps for saving. You can then share the signed document via email, message, or any other preferred method.
Signing documents on your iPhone is a straightforward process, saving you time and reducing the need for physical paperwork. Whether you’re a professional closing deals on the go or an individual handling personal documents, the ability to sign digitally enhances your productivity. Stay tuned for more guides on maximizing your iPhone’s capabilities for document management and editing.
Collaborative Editing and Cloud Integration
In the era of seamless digital collaboration, the marriage of collaborative editing and cloud integration on your iPhone transforms the way we work with PDF documents. This dynamic duo not only facilitates teamwork but also ensures that your edited documents are easily accessible across devices. Let’s delve into the benefits and practical aspects of collaborative editing and cloud integration.
1. Choose a Cloud-Enabled PDF Editing App
To harness the power of collaborative editing and cloud integration, start by selecting a PDF editing app that seamlessly integrates with cloud services. Apps like Adobe Acrobat, PDF Expert, and Microsoft Office suite offer robust features while seamlessly connecting to popular cloud platforms like iCloud, Google Drive, or Dropbox.

2. Invite Collaborators and Share Access
Once you have your PDF document open in the chosen app, explore the collaboration features. Typically, you can invite collaborators by sharing a link or directly providing access to the document. Collaborators can view, comment, and edit the document in real-time.
3. Real-Time Editing and Commenting
As collaborators join in, the magic of real-time editing begins. Multiple users can make simultaneous edits, add comments, and engage in a dynamic workflow. This is particularly beneficial for team projects, feedback sessions, or when working on documents with tight deadlines.
4. Version Control and Document History
Collaborative editing often involves multiple iterations. Cloud-enabled apps keep track of document versions and provide a detailed history of changes made by each collaborator. This ensures transparency and allows for easy reverting to previous versions if needed.
5. Offline Access and Syncing
One of the significant advantages of cloud integration is the ability to access and edit documents offline. Changes made offline are automatically synced when the device reconnects to the internet. This ensures a seamless experience even when working in environments with limited connectivity.
6. Secure Collaboration with Permissions
Maintain control over your collaborative projects by setting permissions within the app. Specify who can view, edit, or comment on the document. This feature ensures that sensitive information remains secure, even in a collaborative environment.
Collaborative editing and cloud integration on your iPhone redefine the way we work with PDFs. Whether you’re part of a team project or collaborating with clients, these features enhance efficiency and streamline the collaborative process. Stay tuned for more insights into optimizing your PDF editing experience on your iPhone.
Troubleshooting Common Issues
While editing PDFs on your iPhone is generally a smooth experience, occasional hiccups may arise. Understanding how to troubleshoot common issues ensures that you can navigate these challenges seamlessly. Let’s explore some frequent problems users may encounter and the steps to troubleshoot them effectively.
1. App Crashes or Freezes
Issue: The PDF editing app crashes or freezes unexpectedly.
Troubleshooting Steps:
- Ensure your app is up-to-date by checking for updates in the App Store.
- Restart the app or force close it and reopen.
- If the problem persists, consider reinstalling the app.

2. Compatibility Issues with File Formats
Issue: Difficulty opening or editing certain PDF files.
Troubleshooting Steps:
- Confirm that the PDF file format is supported by your chosen editing app.
- Try converting the PDF to a different format using online converters.
- Check for app updates that may include enhanced compatibility.
3. Syncing Problems with Cloud Services
Issue: Edits made on one device are not syncing with other devices.
Troubleshooting Steps:
- Check your internet connection and ensure it’s stable.
- Verify that the app settings allow for automatic syncing.
- Manually sync the document or log out and log back into your cloud account.
4. Loss of Data During Editing
Issue: Edits made to the document are lost or not saved.
Troubleshooting Steps:
- Save your changes frequently to avoid data loss.
- Check the app settings to ensure autosave is enabled.
- If the issue persists, consider exporting the document and opening it in another app.
5. Inability to Access Markup or Editing Tools
Issue: Markup or editing tools are not accessible within the app.
Troubleshooting Steps:
- Confirm that you are using the correct app for editing.
- Check the app settings to ensure the Markup or editing tools are enabled.
- If using a third-party app, explore the app-specific settings for tool access.
6. Document Rendering Issues
Issue: The document appears distorted or fails to display correctly.
Troubleshooting Steps:
- Close and reopen the document.
- Check for app updates that may include improvements in rendering.
- If the issue persists, consider opening the document in another compatible app.
Mastering the art of troubleshooting common PDF editing issues on your iPhone ensures a seamless and frustration-free experience. By understanding these common problems and their solutions, you can navigate any challenges that may arise during your document editing endeavors. Stay tuned for more guides to enhance your PDF editing skills on your iPhone.
Conclusion
In the ever-evolving landscape of digital document management, your iPhone stands as a versatile tool for efficient PDF editing. From mastering the built-in Markup tool to exploring the advanced features of third-party apps, you’ve embarked on a journey to elevate your document editing prowess.
Collaborative editing and cloud integration have opened new frontiers, allowing you to seamlessly work with colleagues and access your files across devices. The ability to sign documents on your iPhone transforms traditionally cumbersome tasks into quick and paperless processes.
As you navigate the world of PDF editing, troubleshooting common issues becomes a valuable skill. The power to overcome challenges ensures that your experience remains smooth and productive, even in the face of unexpected obstacles.
Whether you’re a professional managing complex contracts or a student annotating lecture notes, the capabilities of your iPhone empower you to edit PDFs with ease. Stay tuned for more insights, tips, and guides as we continue to explore the boundless possibilities of document editing on your iPhone.
Empower yourself with the knowledge gained from this guide, and make your mark in the world of digital document management. Your iPhone is not just a device; it’s a powerful tool that puts the entire realm of PDF editing at your fingertips. Until next time, happy editing!